
Best Practices for the Services Using Microsoft Cryptography Suites
SeverityHigh
trBu makaleyi Türkçe okuyunSEVERITY
High
BACKGROUND
Default installations of SSL over HTTP are essential but come with pre-settings which are not compatible with PCI-DSS on most systems. When a browser starts to communicate with the SSL enabled server, the server sends a list of ciphers that can be used to secure communications with the browser. Some of the ciphers offered by the server with the default installations may be weak or non-compliant to PCI-DSS. This is an essential guide to disable these ciphers on various systems.
AFFECTED SYSTEMS
Internet Information Service (IIS) and RDP – Microsoft Windows
PoC
Default IIS configuration with system-wide protocol and cipher series include weak ciphers and protocols enabled by default.
Having an SSL certificate doesn’t automatically make your connection secure. To make your server more secure we recommend adding your service to the Onlayer Dashboard. This way, you can track the changes you make and see what needs to be changed in order to make your service more secure. One thing you should do now to improve your SSL security is to remove weak ciphers from your list of ciphers. Our default Windows IIS installation on the Dashboard looks like this with the weak ciphers.
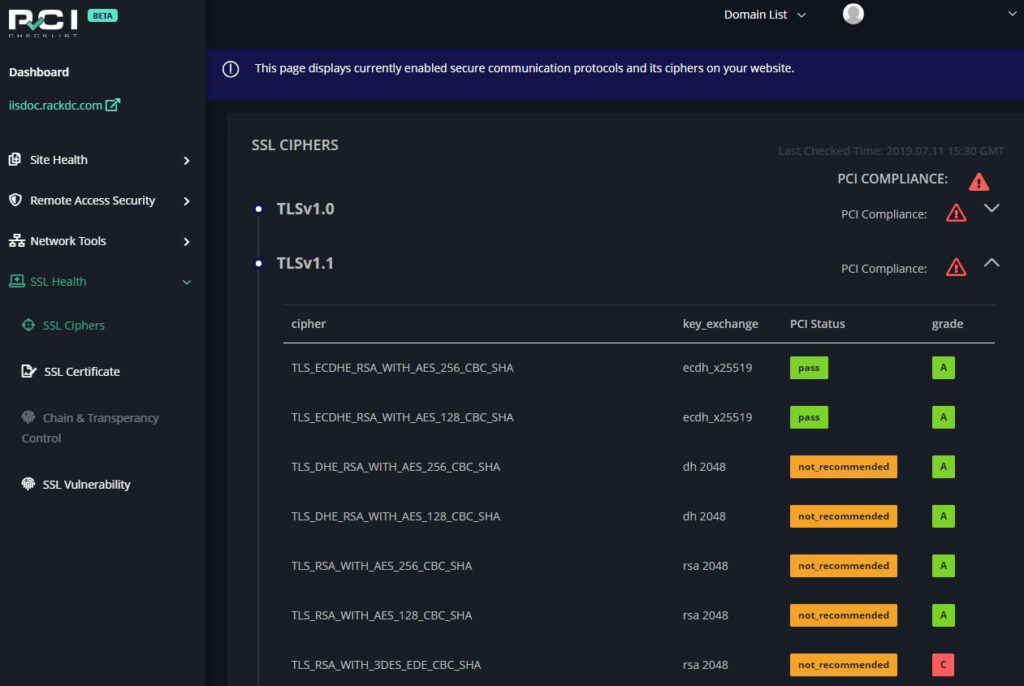
The default IIS installation comes with many SSL protocols and many ciphers inside each protocol for backwards compatibility with older browsers. Default installation of many services do not comply with PCI-DSS standards but mostly aim to achieve compatibility.
SOLUTION
Installing Signed SSL Certificate
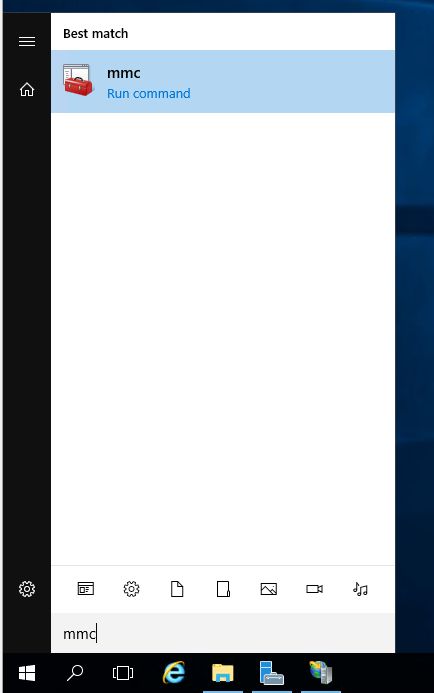
Instructions below describe step by step the installation of a server certificate to a Windows Server. There are handy tools on Windows that can be reused if set up correctly. To do so, type mmc after clicking the Windows icon on the bottom left side of the screen:
MMC (Microsoft Management Console) will be empty when executed for the first time. We will add the snap-ins required in order to add a certificate and manage IIS.
To add a new snap-in click CTRL+M or use file menu → Add/Remove Snap-in link:
- Add Internet Information Service
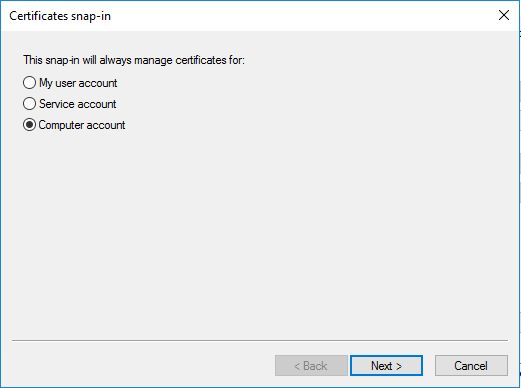
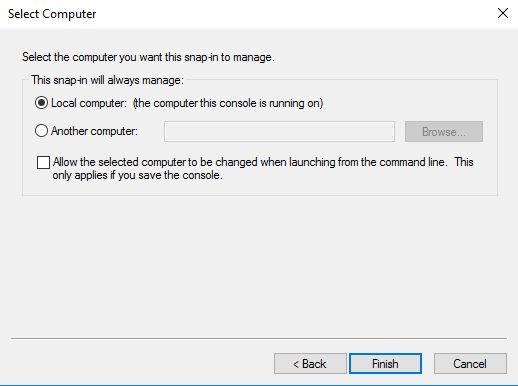
- Add Certificates → Computer Account → Local Computer as seen below:
Now, your mmc console will look like this:
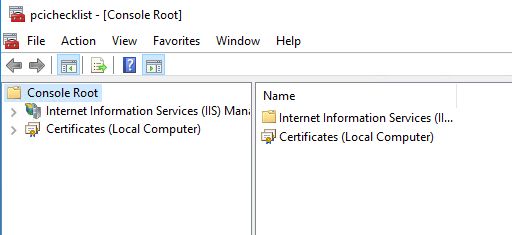
After adding these snap-ins, save the current configuration to your desktop for later use. We called the mmc instance “onlayer”.
Importing Signed Certificate
Expand mmc console Certificates branch and right click Personal, from the menu select All Tasks → Import as seen on the picture below:
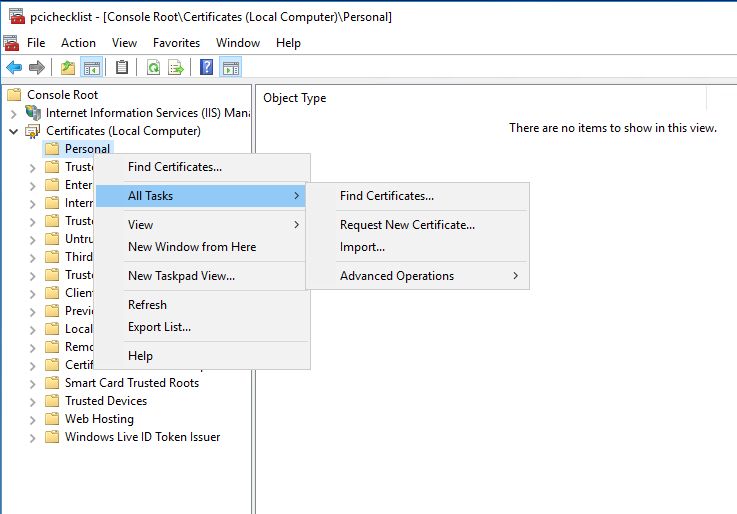
A wizard window will open and ask you the location of the signed certificate file, please select the file location and click next. If your private key was protected with a password enter it. If not just press next. On the next page select Automatically select the certificate store based on the type of certificate and click next
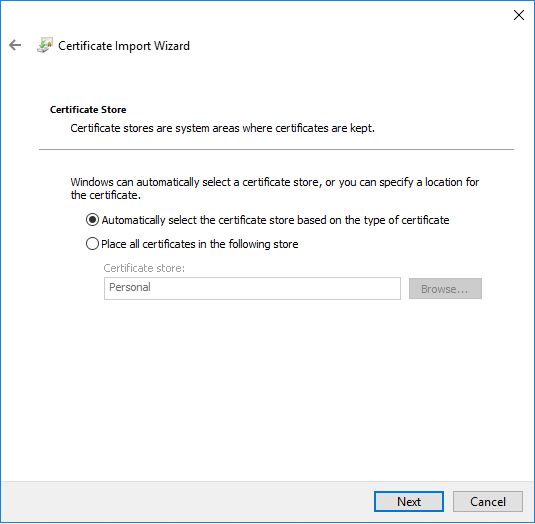
Window will close after you click next, now the next step is to add the signed certificate to IIS. To do so, return to mmc and select IIS, point to your default web site as seen below:

On the right hand side, you will see Bindings, click on the link to open the Bindings window
If you didn’t add any bindings except the default one, you would only see a HTTP binding. On the default IIS installation, HTTPS binding will not be present. To add a HTTPS binding, click add
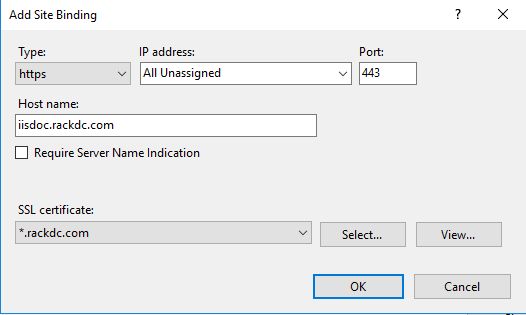
For the type select https, if you want a certain IP address to listen to https bindings you have to select the desired IP address from the IP address drop down. For our case we selected All Unassigned, which means your HTTPS server will listen to all interfaces with all IP addresses assigned.
If you set a Host name, incoming requests will be traced and only matching host name requests will be signed by the certificate, this is important if you plan to host multiple SSL enabled sites on the same server.
Finally select the SSL certificate which you previously imported with mmc console and press OK.
To check your server SSL configuration, go to the site via a browser:
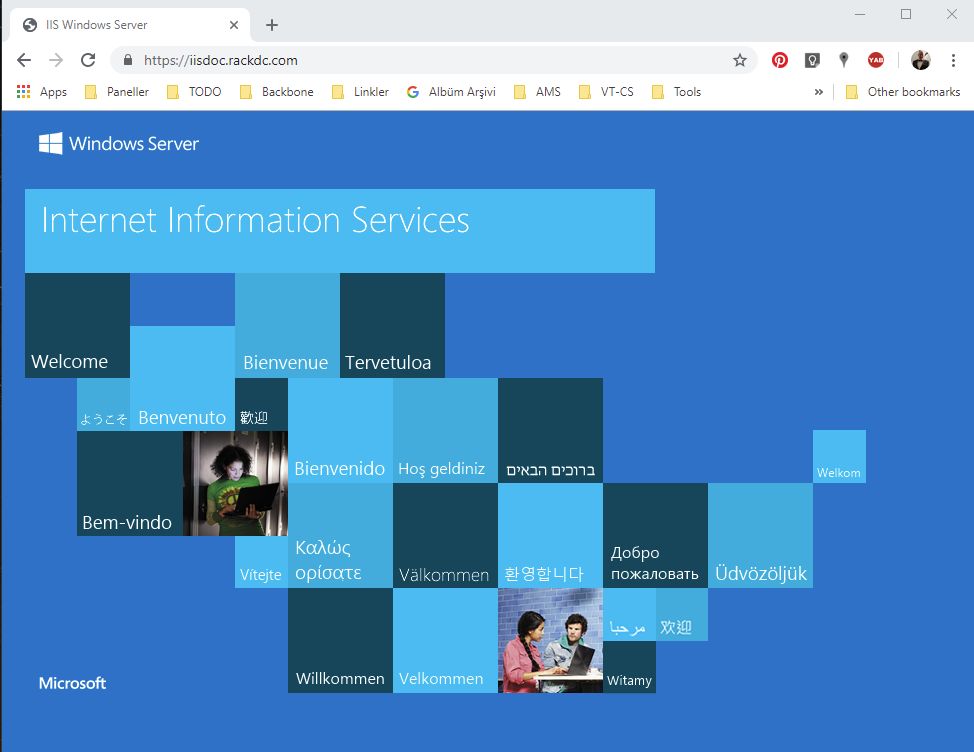
You should see the lock sign on the left hand side of the domain name as shown above, indicating that you succesfully installed your SSL certificate.
Onlayer Hardening
First of all, you have to disable the old/insecure protocols. On Windows Servers, regedit.exe is used to handle protocol configurations. Start regedit.exe by typing the name after clicking Windows icon on the left bottom side of the screen.
You will see a list of branches on regedit. Prior to changing anything on regedit we recommend having a backup of the system. To do so, click file → export. On the save menu make sure the export range is set to All and save the file. This will allow you to import back your original settings if anything goes wrong.
Back in regedit go to the branch “HKEY_LOCAL_MACHINE\SYSTEM\CurrentControlSet\Control\SecurityProviders\Schannel\Protocols\”
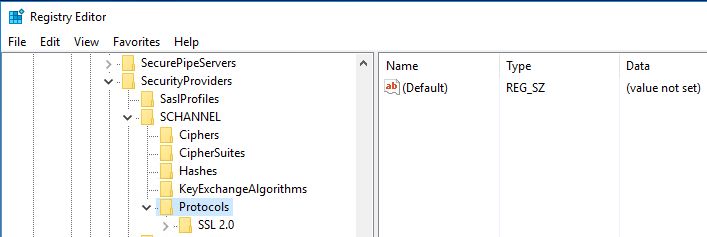
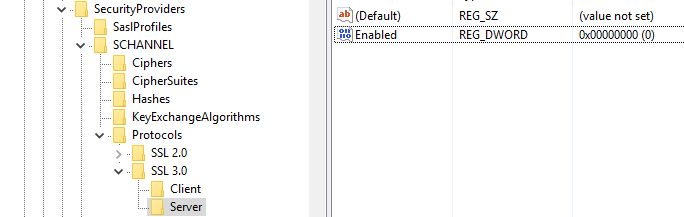
At this stage, you will see a list of protocols, in our case we only have SSL 2.0 and we need to disable SSL 3.0, TLS 1.0 and TLS 1.1 which are not present in default installation. We will add each one to the list.
Don’t worry if you can’t see SSL 3.0 in the current branch of the tree. Simply insert a new key by right clicking Protocols > New > Key. Name the key “SSL 3.0” and add two new keys under this newly created branch and call them “Client” and “Server”.
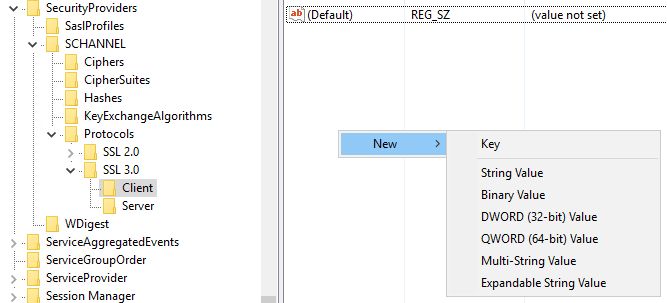
Now you will create two new keys, one is under the Client branch and the other one is in the Server Branch. Create a new DWORD32 key on Client branch called “DisabledByDefault” and set the value to 1 and save.
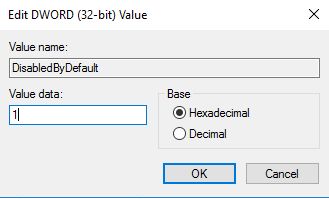
On the Server branch add another DWORD32 key with the name “Enabled” and set it to 0. You might also be missing a “Server” branch under SSL 2.0. If so, add this branch and do the same for SSL 2.0 to disable SSL 2.0 connections.
Repeat the previous steps with “TLS 1.0” and “TLS 1.1” keys under Protocols. After that you should see the protocols as in the screen shot below:
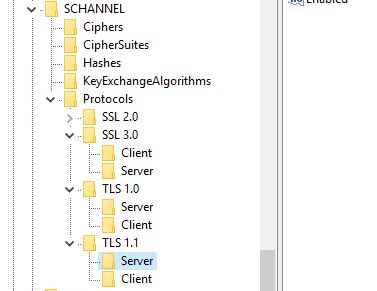
You have now successfully disabled PCI-DSS failing ciphers that fall into SSL 2.0, SSL 3.0, TLS 1.0 and TLS 1.1 categories. Next we move on to disabling weak ciphers left on TLS 1.2 and TLS 1.3 categories.
Disable Weak Ciphers
Go to the branch “HKEY_LOCAL_MACHINE\SYSTEM\CurrentControlSet\Control\SecurityProviders\Schannel\Ciphers\”
Right click on Ciphers and add new four keys, RC4 128/128, RC4 40/128, RC4 56/128 and Triple DES 168.
In each newly created key, add DWORD32 key “Enabled” and set it to 0. This will disable these weak ciphers from being used by your server.
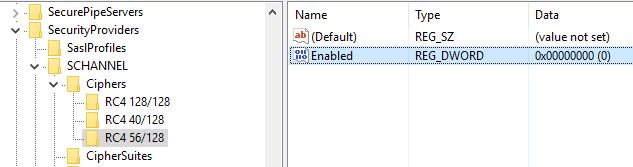
Restart the server for the changes to take effect. Your SSL communications are now PCI-DSS compliant!
Track the changes on Onlayer Dashboard, you should see green the compliance sign on certificate details.
We try to reflect all PCI-DSS changes in timely manner, so please bookmark this page for tracking updates. You may also generate alarms from Onlayer Dashboard for PCI-DSS compatibility.
LEGAL Copyright (c) 2019 – 2026 ONLAYER Bilişim Teknolojileri A.Ş.
Permission is granted for the redistribution of this alert by explicitly linking the page to be referred. It may not be edited in any way without written consent.
Disclaimer: The information in the advisory is believed to be accurate at the time of publishing based on currently available information. Use of the information constitutes acceptance for use in an AS IS condition. There are no warranties concerning this information. Neither the author nor the publisher accepts any liability for any direct, indirect, or consequential loss or damage arising from the use of, or reliance on, this information.